Saturday, November 2, 2013

Cardboard Chair

Oh yes, you read the title correctly. For one of my architecture classes my design collaboration group and I were required to design and build a chair out of cardboard, strong enough to hold a 200 pound person. Challenge accepted.
Although this isn't really a "tutorial" I still thought it would be fun to share the process and final product.

We all had different ideas in our heads to begin with but we agreed notching the cardboard and making a kind of "honeycomb" would make the chair structurally sound. Did I mention we couldn't use glue or any other hardware?

We started with a basic shape I sketched with the plan to replicate it 4 or 5 times.


Next, we created a tiny incomplete model to test the integrity of the chair and see if it would hold 15 pounds.


To our delight, it did!

Although we wanted to charge full steam ahead and start building the final thing, I decided to build a half-inch scale model to save ourselves the headache and possible heartbreak of failure. We needed to see how all the pieces would be cut out and fit together as a whole.


Work in progress...


Fitting it all together...

(Finalized model)

 I was so happy with how it turned out!

(Two models together.)

And imagine my excitement when I figured out I could sit in the little chair and not crush it!


At this point we knew we were going to need large sheets of cardboard with no bends or holes in it for the final product. Can I just tell you that sheets of cardboard are harder to find than the pot of gold at the end of a rainbow?! 
But, we weren't going to let a little thing like that stop us.

And we found cardboard...

(This wasn't even all of it. Suffice it to say we were drowning in cardboard!)

As a side note: Do you know how hard it is to work on a chair when there is a sleeping kitten on it?

(Best distraction ever.)

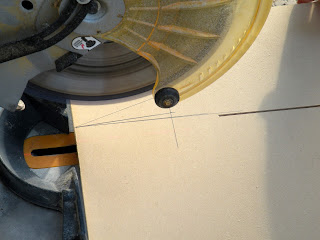
We repeated the process used for the half-inch scale model at full size and in no time had our finalized chair!


The seat is 18" high (from the ground) and the back is 36" high, so it's an average size chair that is around 1 pound and 100% recyclable!


I have to say I'm really proud of the final result. Given our restrictions and requirements it turned out well. Some of my group mates had never experienced dreaming up an idea and then making it a tangible reality so it was really fun to see their excitement as we worked on this together. 

It's always exhilarating for me to so this kind of work, especially for school, and sometimes I have to take a step back and pinch myself to make sure it's real. 

P.S. I wrote this sitting in the cardboard chair :)


Sunday, October 6, 2013

Magazine Flowers

I don't know about you, but I love flowers. What I don't love about flowers is that they die too quickly. But have no fear... there is a solution!


I can't count the number of times I have made these. They are so simple and pretty you really can't go wrong. They can be used in endless ways. I've tied them to gifts, given them as a bouquet, or placed one or two in a vase as decoration. 

Now that you're inspired to exercise the right side of your brain and become a professional floral designer, I'll show you how to make it happen!

 ----------------------------------------------------------


- Old magazines
- Pipe cleaners (in your color preference)
- Scissors
-Single hole punch
-Buttons (optional)


Go through the magazines and tear/cut out some colorful pages. Maybe you have a color scheme in mind? Ads never disappoint.


Trim off any rough edges. Fold each page like a fan to create long strips.


Now flatten your folded pages and cut along the folds!


Place a small button at the top of the pipe cleaner. If you don't have buttons just cut a small piece of pipe cleaner and wrap it around where the button would be. The button is only there to stop your "petals" from sliding down the pipe cleaner and won't be visible once you're done.


Time to punch some holes! Punch holes at the beginning, middle, and end of each strip of paper. There will be a total of three holes.


Bend the strip and line up the three holes to meet in the center.


Start adding petals one at a time. The more you add, the fuller the flower. As a general rule I do four, but I'm am a fan of creative freedom and if you feel like adding 100, then by all means, do! (And upload a picture so we can see it!)


Slide another button on top of your petals to hold them in place. Fold the excess pipe cleaner over to hide the pointy end. Again, if you don't have buttons just bend the pipe cleaner to create a little knot-type middle. It will hold the paper in place just as well as a button. (Yes, I speak from experience.) You may have to trim the pipe cleaner a little bit.


And there you have it... Now repeat the process until you are happy with the amount of flowers! 

Use them anywhere and everywhere! It's a fun way to brighten a room or someone's day.

Interested in making on of those cool tin cans?


HAVE FUN!!


Tuesday, August 27, 2013

Window Box Turned Organizer


So, Jen and I are back from all our summer adventures and officially back in school. Me as a student, her as a teacher, which keeps us both a little busy. But, never too busy to create!
We got together for some much needed craft time. She made a jewelry organizer (tutorial will be posted in the near future), and I made a desk organizer. As an Interior Design student I have a lot of drawing, drafting, and rendering supplies. Seeing them out is part of the inspirational process for me, so I wanted a cute way to display them.


I'm happy with the result and it looks great sitting below my paint chip frame. Which is FINALLY hanging!


  • Wooden box of some sort (mine was a window box)
  • Scrap wood (these will be your dividers/optional)
  • Chalkboard paint
  • Spray paint
  • Regular interior paint (you could easily use spray paint as well)
  • Painters tape 

Like many of the projects we do, I had all of these supplies already. I like the challenge of gathering materials and making something unexpected with them!


Tape off the front. That's where the chalkboard paint will go later. Paint the rest of the box with the interior house paint (or whatever you are using).


Now, the back of my box couldn't be just a boring solid color. I had to be an overachiever and do a chevron pattern. It was not the easiest thing I've ever done, but it was worth it in the end... isn't that usually the case?!
I used this tutorial to create the chevron pattern. It's clear and makes it simple.


Once you have your chevron pattern taped down, spray paint the back entirely.


While the box is drying, measure and cut your scrap wood for your dividers. This is definitely optional, but for what I wanted to use this for dividers were essential. Big round of applause to Jen for helping me/doing this part!


Remove the tape and take a moment to admire that beautiful custom chevron job. Tape off the parts you don't want spray painted (green) and continue painting the sides. NOT the front... that's for the chalkboard paint.


Paint your dividers.


Once everything is completely dry, tape off the sides of your box and paint the front with chalkboard paint. I did several coats for a solid black surface.


Glue your dividers into place in the desired location. I used Elmer's Tacky Glue.

Wait for it all to dry, and you're done!


Front


Back


 I love that it's so versatile. It looks cute from all angles and can be used for anything! I just wipe the chalkboard surface and it can become something totally new.

Have fun creating!

Wednesday, August 14, 2013

Long Overdue... Vacations!!

Shelby and I have been major slackers lately. 

With the last post, we promised that we would put up some pictures of our awesome vacations. 


I posted my Bahamas photos,
I don't know where Shelby's photos from her visit South are,

but I do have Chicago and Wisconsin!!


Even though my vacation started in Wisconsin, and Shelby's started down south, I met her in Chicago and our trip together started there.

We stayed at a cool, haunted hotel...

Saw the giant bean...

Had cocktails on the 96th floor of the Hancock Tower...

Saw a bunch of Frank Lloyd Wright designed homes...

And other buildings that had Shelby screaming like a teenager who just met Bieber.


After Chicago, we headed back to Spring Green, Wisconsin. 


 There, we had the privilege of staying at Taliesin with the Frank Lloyd Wright School of Architecture. 


We enjoyed awesome scenery...

Went to a farm...

Swam in the Wisconsin River...

Went to the House on the Rock....

(Where they had a scary, giant whale) 

Visited Madison...

And saw Hamlet performed by the American Player's Theater on an awesome stage in the middle of the woods.


Oh, and we bought a lot of shoes. 

But now, we are back home in AZ and not ready to get back to real life.

Vacations are way better. 


Anyway, we have a lot of posts about arts and crafts ready to go, so we'll get on those soon!
I also just started up school, and I have a whole bunch of cool stuff in my classroom that I want to share.